Working with Visual Studio Database Projects
Visual Studio keeps a SQL file for each and every object in the database, and it can be cumbersome to have to maintain these manually, especially when working with tables. A more productive process is to have visual studio create a database locally for you, make your modifications in SQL Server Management Studio, and then synchronise these changes directly into Visual Studio.
Initialising the database project schema
If you haven’t done already, create a new database project, relative to the version of SQL Server you are using – in my case, this is SQL Server 2008…

If you already have a database schema, you will need to import this into the project. Right click the database project node in solution explorer and choose ‘Import Database Objects and Settings…’
The ‘Import Database Objects and Settings…’ option can also be accessed from the Project Menu.
Run through the wizard that appears and your existing schema will be imported into your database project, resulting in a sql file for each schema object…
Creating a local copy of the database
Now that your schema is defined in the database project, you can deploy this to an instance of SQL Server directly from Visual Studio. Double click the properties node in solution explorer and switch to the ‘deploy’ tab, where you can configure the scope of your deployment settings – are they just for you, or something you want to configure for every developer using the project. A typical scenario for ‘My isolated development environment’ would be your local development PC and for ‘My project settings’ a development server used for pre-production testing. These settings are build configuration specific, so you could configure settings that would push to your local test server, a pre-production environment, or even a live server if you or your team have enough confidence in the process.

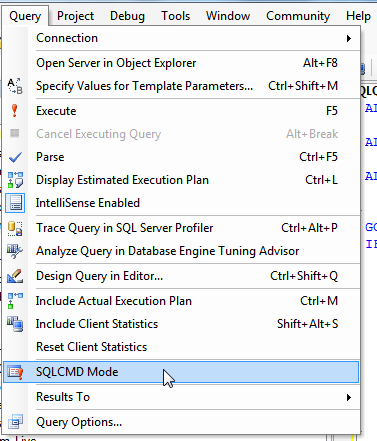
The ‘Deploy action’ should be set to create a deployment script and deploy to the database if you want it all done for you. Alternatively, you can just take the script it creates and run it in SQL Server yourself. If you do this, you must ensure SQLCMD mode is enabled, as the script utilises this SQL Server feature heavily in the created script, and it would fail to run without it set. The target connection must be set to enable the deploy tool to target your server and database.
Setting SQLCMD mode…
Synchronising changes into your project schema
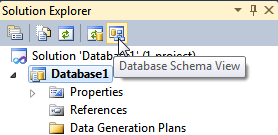
While it is possible to develop your schema directly in Visual studio by editing the SQL file for each schema object in the text editor, it can be very cumbersome, especially with tables, as the keys and indexes are stored in their own files. A more fluid and familiar process is to make the schema changes within SQL Server Management Studio, and synchronise these back into the database project. To do this you must open the ‘schema view’ window in Visual Studio…
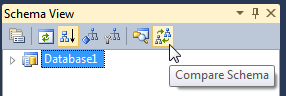
Select the Top Node (which will have the same title as your database project), and click the ‘Compare Schema’ button…
This will open the ‘Compare Schema’ dialog, where you specify the source and target schemas. The source is your local database that you have made your modifications to, and the target is the Schema of your database project. Visual Studio automatically sets the source to your database project, so you must click the swap button to change this…
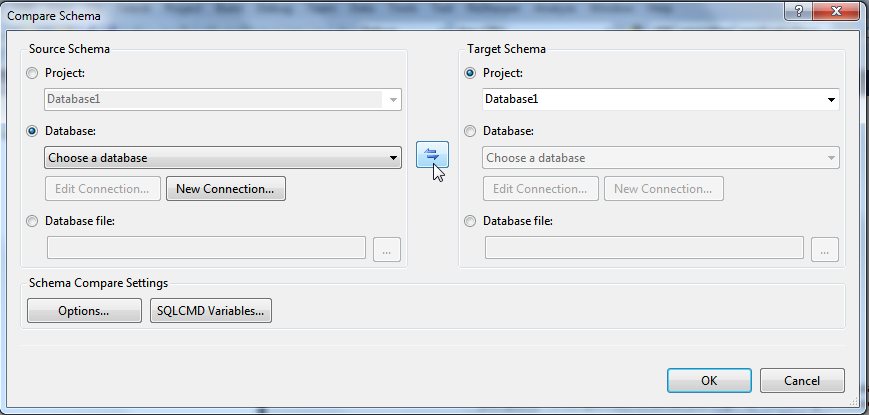
Now that your database project is set as the target schema, you must select your local database as the source schema on the left hand side of the dialog. If your database is not in the list, click ‘new connection’ to add it. Once you have confirmed your settings the schema comparison will take place and the results presented to you in a visual studio tab…
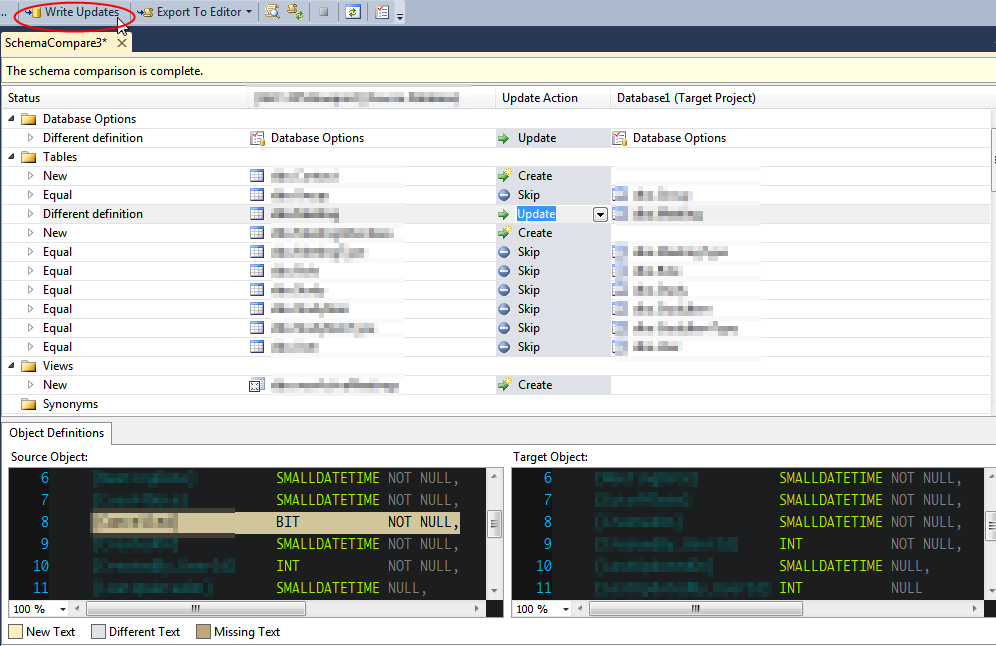
Clicking on each schema object will focus the Object Definitions window on the specific differences between target and source, enabling you to review each one. Click the ‘write updates’ button to push the schema changes to the target. Inspect the schema in your database project to verify that the schema changes have been propagated correctly.
Its worth noting that the process in Visual Studio 2012 is pretty much the same, with just a few minor differences.